

I used Basically Bare's 'Funky Findings' mini album for the base, and added lots and lots of other goodies. The charms are Tim Holtz' 'Adornments' and the chipboard key is also from Basically Bare.

The photo on the left page is actually a page inside a page, made from red Card Shoppe card stock, and ties closed with a bow. The corrugated cardboard that is exposed on the right hand page is very easy to do ... simply cut a line with a craft knife that goes just through the outer covering of the cardboard. Mist it with a light misting of water and let it wait a few minutes. Once the water has soaked in, tear away the outer covering of the cardboard and you have the exposed ripples of the corrugation.

The vintage valentine at the bottom of the left page is a flip frame which holds two pictures on the inside. The right hand page is a 'policy envelope' that I covered with patterned paper and created a closure using Epiphany Crafts Round 25 Bubble Caps and Brads. The canvas heart is from Basically Bare, and the pin at the top left is a Tim Holtz 'Trinket' Pin.

I love the 'blackboard' chipboard key from Basically Bare's 'Jailers Keys' set. I didn't do a thing but add the ribbon and tag. If you make this project, make sure you do NOT do a mirror image of the two large Bazzill buttons ... if you do, they will meet and make the album 'uncomfortable' to close. Instead, put them both on the right side of the page. On the right page, the vintage valentine is another flip mat that will hold two photos inside. The heart at the bottom is an element of the patterned paper. For the tab on the right hand page, I punched two 1/8" holes in the tab and then ran red ribbon through the holes from both sides and tied small bows. That way there is a bow on each side of the tab. (See next photo)

Do you see the red bow on the tab? That is the back side of the one above. Getting the ribbon through the holes just right is a bit tricky, but you can do it! To make the pocket on the right hand page, simply cut a strip of patterned paper about 1/2 to 1" taller than you want it to be on your page. Punch a border in the top edge, ink all the edges, then mist the paper with water. Fold and wrinkle and pleat the paper and let it dry. Once it is dry you can adhere it to your page. I used Inkssentials 'red line' tape because I wanted it to hold very well on the canvas page.

I simply stamped a journaling stamp onto cream card stock, then trimmed around it for the journaling on this page. Then I matted it and a sticker onto red card stock. The border is one row of the Maya Road Antique Alterable Scallop Trim, and two rows of the Websters pages Market Red crocheted trim. The charm is also from Tim Holtz' 'Adornments'. For the two small envelopes, I embellished them with a well inked paper doily that I inked heavily with brown ink and a sticker, and for the bottom I used another sticker and an Epiphany Crafts 'Round 25' bubble cap over another sticker from the Authentique Collection.

For this side of the smaller envelopes I used another Tim Holtz charm and a couple of Epiphany Crafts 'Round 14' Bubble Caps on elements from the Authentique paper. The white bow behind the vintage valentine is actually attached to a tag that pulls out. On the right hand page I used another journaling stamp and then did another flip mat with space for two pics on the inside.

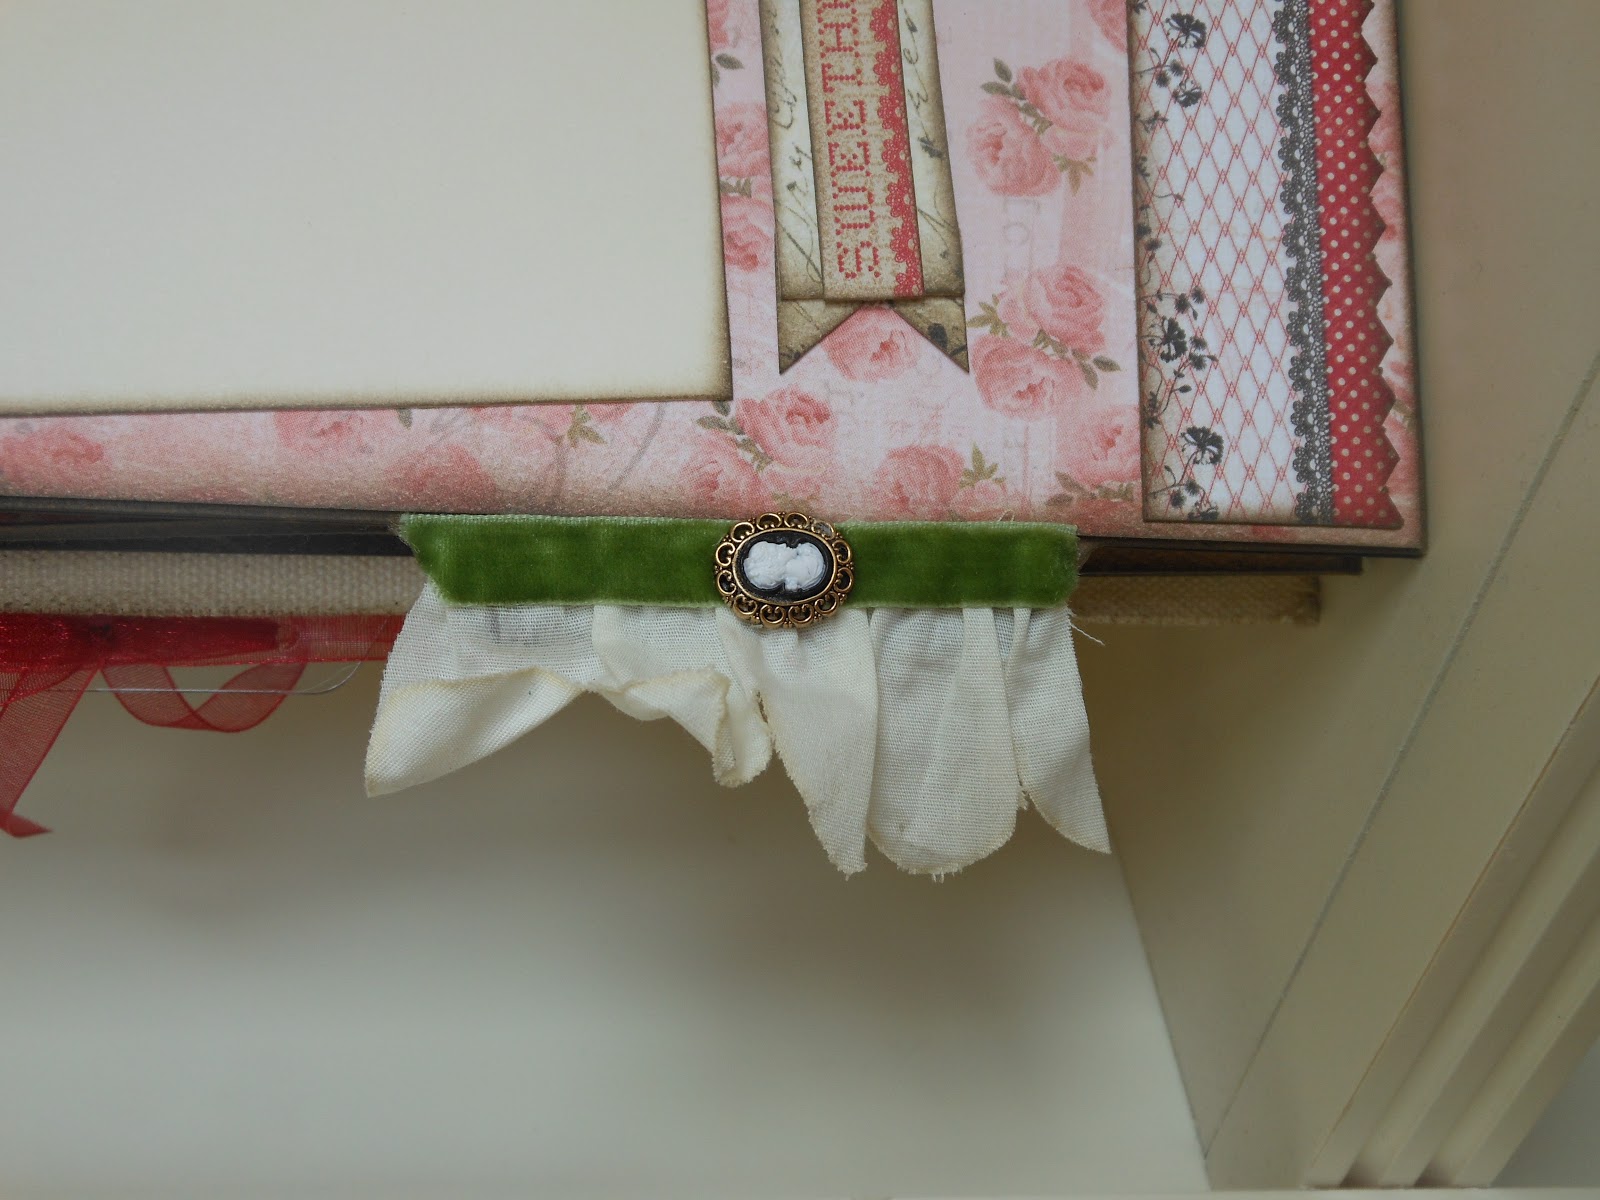
The last two pages! Notice the embellishments on this side of the tab on the left hand page? I used more of the Maya Road alterable trim and some green velvet ribbon, with a cameo button from my stash. The right hand page is simply elements from the paper collection.
 |
| Close up of the tab. |

The back cover is simply a bit of the 'love letters' paper. One tip ... for the May Arts silk ribbon, take your length of ribbon home, loop it over a couple of clothes hangers and spray it lightly with some spray starch. Allow it to dry, then spray again to get any sections you may have missed. This makes this super soft ribbon so much easier to work with!
Supplies:
Patterned Paper - Authentique 'Lovely' Collection - 'Be Mine', 'Crush', 'Valentine', 'Greetings', 'Dainty', 'Fancy', and 'Amour'
Die Cuts - Authentique 'Lovely' Collection
Mini Album - Basically Bare 'Funky Findings'
Canvas Hearts and chipboard keys - Basically Bare
Card Stock - Bazzill Basics 'Card Shoppe' Card Stock
Charms - Tim Holtz 'Adornments'
Tim Holtz 'Trinket Pins'
Blingy Buttons - Bazzill Basics 'Alexandria'
Ribbon - Maya Road 'Antique Alterable Scallop Trim in Cream', May Arts 'Silk - SK01', May Arts 'Green Velvet', Creative Impressions Organdy in 'Red' and 'Pink Lemonade', and Websters Pages ' Marked Red' Crocheted Trim
Epiphany Crafts - 'Round 25' Shape Studio Tool and Bubble Caps; 'Round 14' Shape Studio Tool, Bubble Caps and Brads
Other: Red Glitter, Rose Seam Binding, Various Buttons, Paper Doilies 'Wilton', Brown Ink - Stampabilities, hook and loop adhesive dots (WalMart)
I hope you have enjoyed this project! I know I enjoyed making it ... working with the Authentique paper was a joy, and it only took me a couple of days to put together! Blessings,

1 comment:
Wow. This looks complicated but beautiful!!!! I could never imagine doing this!
Post a Comment