Thanks for visiting!


Welcome! This is the place where I share my artsy and crafty projects. I am an evolving artist these days ... finding myself enjoying less of the cards and mini albums that I have made for years, and turning to art journaling and more artistic endeavors. I have always enjoyed some craft or other, and some of my earliest memories of my mother helping me make paper dolls and other crafts. I am now in my 60's and finding myself more passionately enjoying creating beautiful things and learning new skills and techniques and products.

While you are here I hope you will find inspiration and ideas for making your own projects, however any images or projects you find here are my personal property and should not be used for your own monetary gain, or for contests or challenges. Thank You!

5/18/2012

We R Memory Keepers - Anthologie - Featured Facebook Guest Designer

I am so excited, thrilled and honored today to have been chosen as a featured guest designer on Facebook today for We R Memory Keepers!!!  I love their products, from papers and accompanying products, all the way up to their wonderful 'The Cinch'!  And when I was asked to make a product using their 'Anthologie' collection, well, I was just ecstatic!  It is such a gorgeous collection, full of pretty colors (I call them citrus and berries) and sweet, sweet images and patterns.  I loved working with it, and am so pleased with the finished product - a mini album - as well.

I will warn you, this is a photo heavy post, but I couldn't leave out a single bit of this album.  Here are a few images of the outside ...


Front View - using May Arts ribbon and a Prima flower, along with some 'Platinum' Stickles as embellishments.


Side View ... I'm the queen of chunky albums!

The binding ... and yes, I used my 'The Cinch'!


And the back view is just as pretty as the front!

There are a couple of different 'themes' that you can use with this collection, but I chose to use the more romantic theme, so the first page says 'This is where our story begins'.  I used a couple of Prima flowers for embellishments.  Page two has a pocket with two tags of kraft paper with stamped journaling spots on the back, so you could put photos on the front if you chose.  They have Prima hydrangea blooms and gems, and some Fancy Pants ball fringe.


Pages three and four are two of my favorites!  The 'coral pink' square you see below is a 'flip mat' that has room for two pictures inside.  The only embellishments on this page are stickers from the 'Embossible Designs' stickers for this collection, and a tiny bow of seam binding ribbon.

Page Three - view 1

Page 3 - view two, showing photo mats

Page four is one of my favorite ways of making an album page.  It's an envelope page that I made of kraft card stock.  The flap on the bottom is held with hook and loop tape, and you can store ephemera inside.  The corrugated cardboard is a bit of a sheet that came in a package I received ages ago!  The embellishments here are mor of the embossed stickers and a Prima flower.

Page 4 - view one


Page 4 - view two - showing envelope flap


Page 4 - view three - showing opened envelope

Pages five and six are very easy pages!  The photo mat is 'double matted with the brown and lemon textured cardstock made to coordinate with this collection.  I also cut the U and S from the Vintage Alpha patterned paper.   Page six has a pennant banner cut by hand and 'strung' on some Maya Road corded twine.  The brown 'booklet' has Prima canvas tape binding and a chipboard sticker.  Inside the booklet I glued paper from a vintage journal as a place to do your journaling.


Page 5 - View One


Page 5 - view two

Page 6 - view one


Page 6 - view two

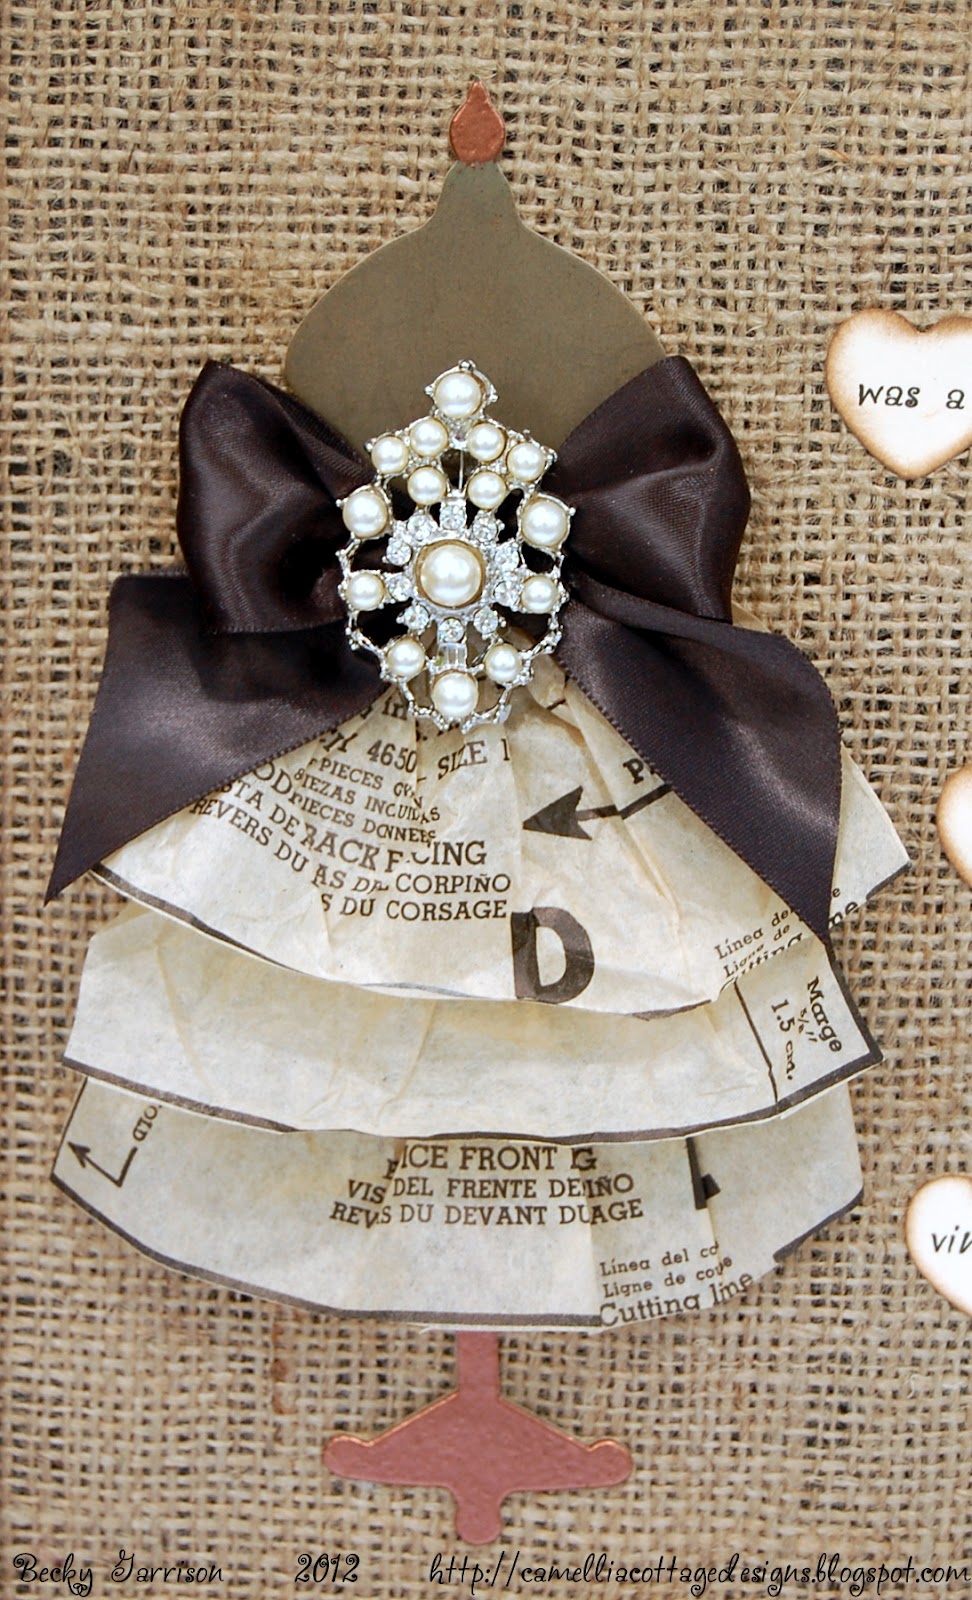
Pages seven and eight are my favorite pages!  The 'Defined' pattern paper is so rich and chocolatey that I knew I wanted to do something special, so I took a chipboard dress form by Basically Bare and 'dressed it up' with some Maya Road floral trim in a rich teal.  Then I tied a big chocolate bow of May Arts silk ribbon around the waist.  A chipboard tag and a couple of Prima gems are all the embellishments this page needed.  Page eight was easy!  I cut the post card from 'Post Cards', added some 'platinum' Stickles, an embossed sticker and a Prima flower, and all of this on top of a piece of grungy corrugated cardboard!


Page 7 - View one


Page 7 - close up of dress form


Page 8 - wouldn't this be a great place to write the 'top 10 things I love about you'?

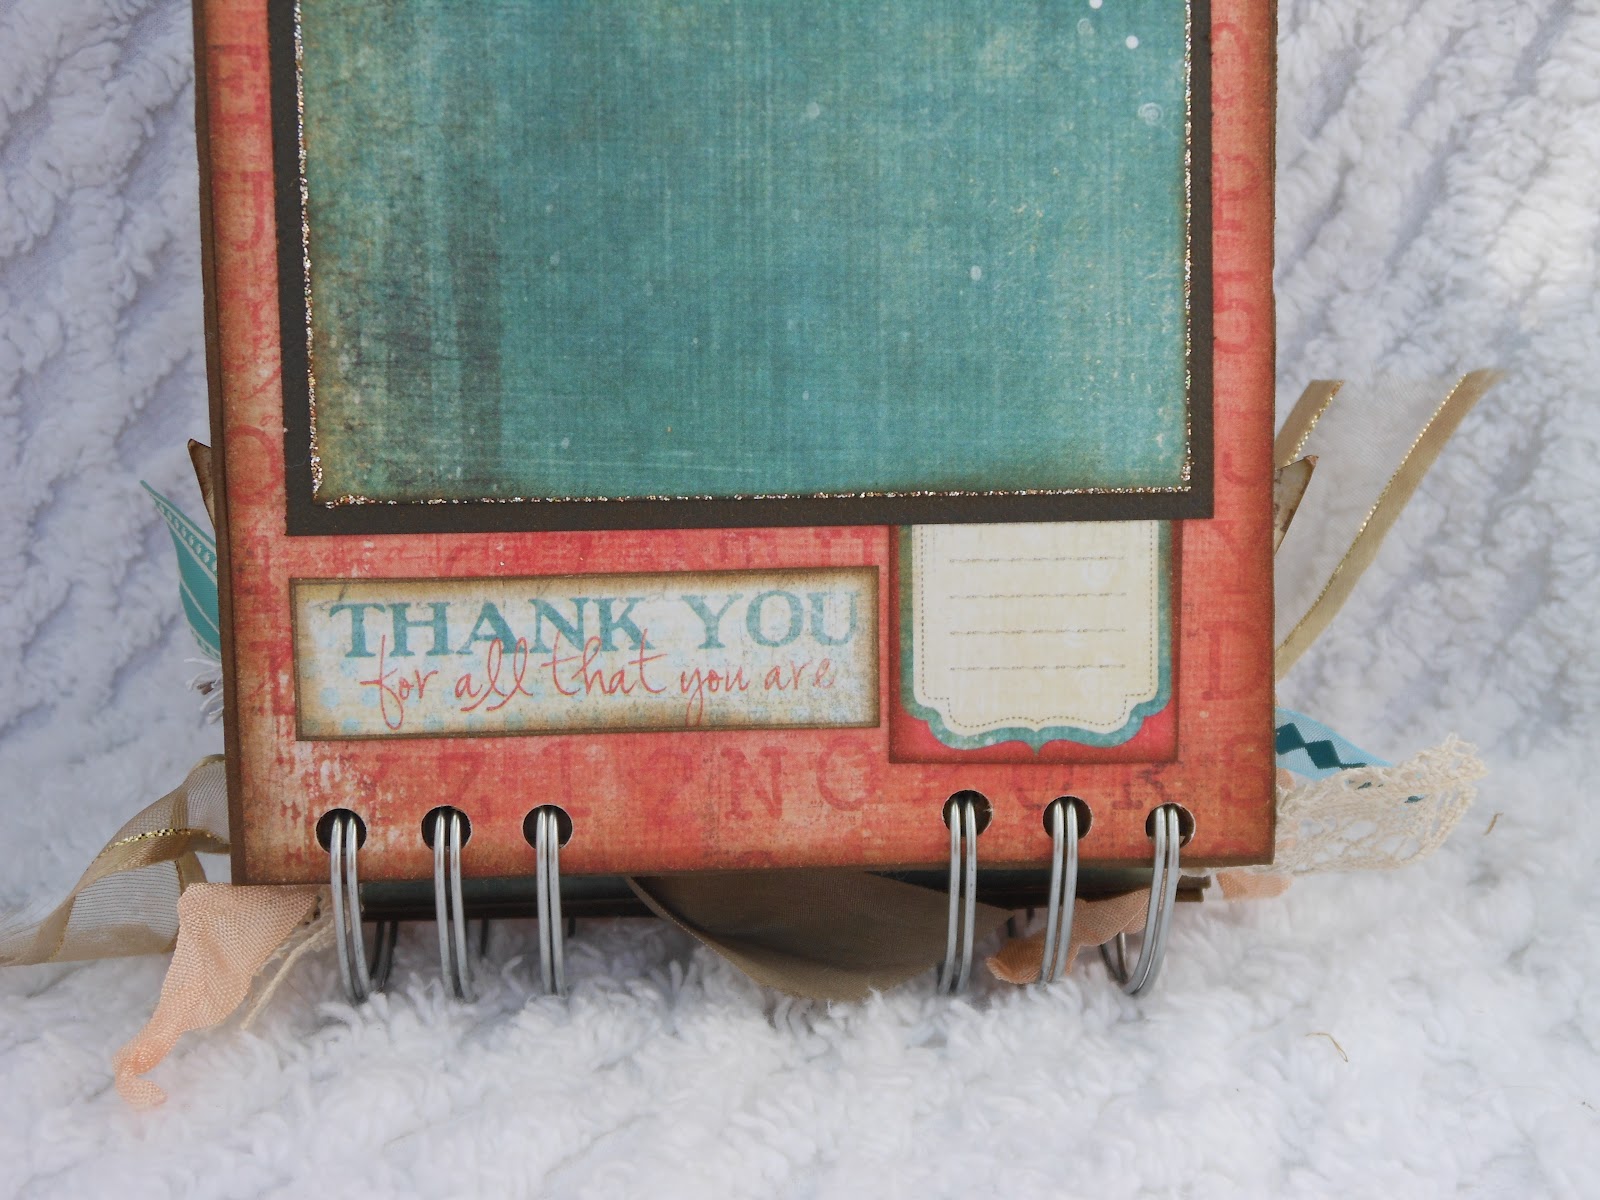
Page nine has a large photo mat and the quote 'Thank You for all that you are', and a small tag.  The mat is double matted and edged with 'platinum' Stickles.  Page ten uses some embossed stickers and ball fringe for a penant banner, and a canvas heart from Basically Bare for a pocket.  I inked the heart and glued it around the edges, added an embossed sticker and Prima flower.  Inside the pocket are a few journaling squares cut from the 'Everyday Moments' patterned paper that I inked with brown ink, punched a hole in one corner, and tied them together with some Maya Road corded twine.


Page 9 - view one

Page 9 - view 2


Page 10 - view one

Page 10 - view two


Page 10 - view three


Page 11 - view one


Page 11 - close up of flower


Page 12 - aka inside back cover - I loved the quotes that were in the patterned paper 'Everyday Moments'!

And that's my album!  I love it and hope you like it, too!  Below I am listing supplies and tools:

Supplies:
  • Patterned Papers - We R Memory Keepers 'Anthologie' collection
  • Colored Card Stock - We R Memory Keepers 'Lemon', 'Salmon', 'Brown', 'Cherry', 'Teal'
  • Chipboard and Embossed Stickers - We R Memory Keepers 'Anthologie' collection
  • Binding Wires - We R Memory Keepers 'The Cinch'
  • Kraft Card Stock - The Paper Studio
  • Green and Taupe Silk Ribbon - May Arts
  • Flowers and Gems - Prima Marketing
  • Brown Ball Fringe - Fancy Pants Designs
  • Brown Ink - Stampabilities
  • Stickles 'Platinum' - Ranger Industries
  •  Canvas Tape - Prima Marketing
  • Chipboard Dress Form and Canvas Heart - Basically Bare
  • Teal Floral Ribbon Trim - Maya Road
  • 'Latte' Corded Twine Trim - Maya road
  • Cardboard, assorted bits of ribbon and vintage buttons - my stash

Tools:

  • The Cinch - We R Memory Keepers
  • Paper Trimmer and Scoring Board - Martha Stewart / Ek Success
  • Border Punch - EK Success 'Arched Scallop'
  • 1.5" Scalloped Circle Punch - Recollections
  • Ruler, scissors, craft knife and ruler

Thanks so much for visiting today!!!  As I said up at top, I was so excited, thrilled and honored to be chosen as a Facebook Featured Guest Artist by We R Memory Keepers!  I love their products, and this collection is one of my favorites of their's ... ever!!!  Please take a moment to leave me a comment, either here or on my facebook page HERE.   Blessings, Becky


5/05/2012

Modern Girl with a Vintage Soul ...

Hi folks!  So much is going on right now ... my Mama is doing well and will be coming home to stay with us next Tuesday until she is ready to go to her home.  We visited the Neurosurgeon today and had a great report.  And I couldn't sleep last night, and was up early this morning playing with paint and burlap and such.  And I love this sweet piece of artwork that I made.  Check it out ...


I used an old frame that I'd had for years.  It was gold metallic, and I spray painted it white, then used black, burnt sienna and burnt umber artists acrylics and a sponge to give it an old, woody look.  The picture that was in the frame had no glass as it was kind of 3 dimensional, so I took out the image and there were 2 pieces of cardboard.  One black and thin, the other very thick.  I wrapped the thinner piece with burlap (yard sale find) and put the frame back together. 


Next I took a chipboard dress form from Basically Bare and inked it very heavily with a bronzey green ink from Anna Griffin.  I heat embossed the stand and the very tip top of the dress form with copper embossing powder from Ranger. I cut pieces of a vintage dress pattern and gathered them and glued them onto the dress form for a skirt.  I tied a big bow from black satin ribbon (another yard sale find, but it is made by Offray), and then I added a brooch that was another yard sale find.  The top of the brooch has a kind of crown look at the top and I loved it for this project.


I used a quote from Christy Tomlinson's new collection that says "She was a modern girl with a vintage soul".  I printed it on ivory cardstock (yet another yard sale find) and then punched out the words using my new Epiphany Shape Studio 'Heart 25'.  I did not use the bubble caps as I felt they didn't work well with the organic feel of the burlap, so I inked them lightly with brown ink, and glued them to the burlap.


And there it is!  A really sweet piece of artwork that uses mostly yard sale finds and cost very little overall.  And I really, REALLY love it!!!  ♥♥♥♥♥

So, please tell me what you think ... I'd love to hear your comments!

Today is National Scrapbooking Day, and I'm going to spend my day at Altered Angel ... my local scrapbooking store, or LSS.  We have a great group of crafty folks who are getting together to play and laugh and catch up.  I hope you get to spend the day being creative, too! 

Blessings, Becky


4/29/2012

Graphic 45 - Olde Curiosity Shoppe Mini Album

Hi There!!!  Do you believe it?  I have time to do a post!   My mama is doing well.  We were able to get her placed in a rehab facility only 8 miles from my home, and she is working on getting her strength back so she can come home with me for a while before she goes back to her home.  Thank you so much for your prayers and good thoughts on her/our behalf!!!

I finished this mini album a couple of weeks ago, but haven't had the time or opportunity to take the pictures or get them posted.  It is another mini album that I made using Graphic 45's 'Olde Curiosity Shoppe' collection.  I have found that I really enjoy designing the structure, or 'bones' of mini albums, and when I had the inspiration for this one, it seemed a good idea at the time, but as work progressed on it, it became more and more of a chore to complete.  But I persevered and am so glad that I did because it turned out really beautiful!

There are a lot of pictures, but I want to show you each page, so let's do them first ...


Front cover


Side View


End View


Inside Front Cover and Page One Closed


Page One Closed.  Flap on right held with hook and loop tape.


Opened pocket with places for photos and journaling.


Pages Two and Three.


Page Two.


Page Three Closed


Page Three Open - The blue photo mat lifts up for space for two more photos.  The tag in the black pocket pulls out for journaling space.


View of flip-up photo mats and tag.


Pages four and five ... Page 5 is corrugated cardboard. 


Close Up of Page Four


Close Up of Page Five - Pocket holds 3 small tags for journaling.


Pages Six and Seven


Page Six Close-Up


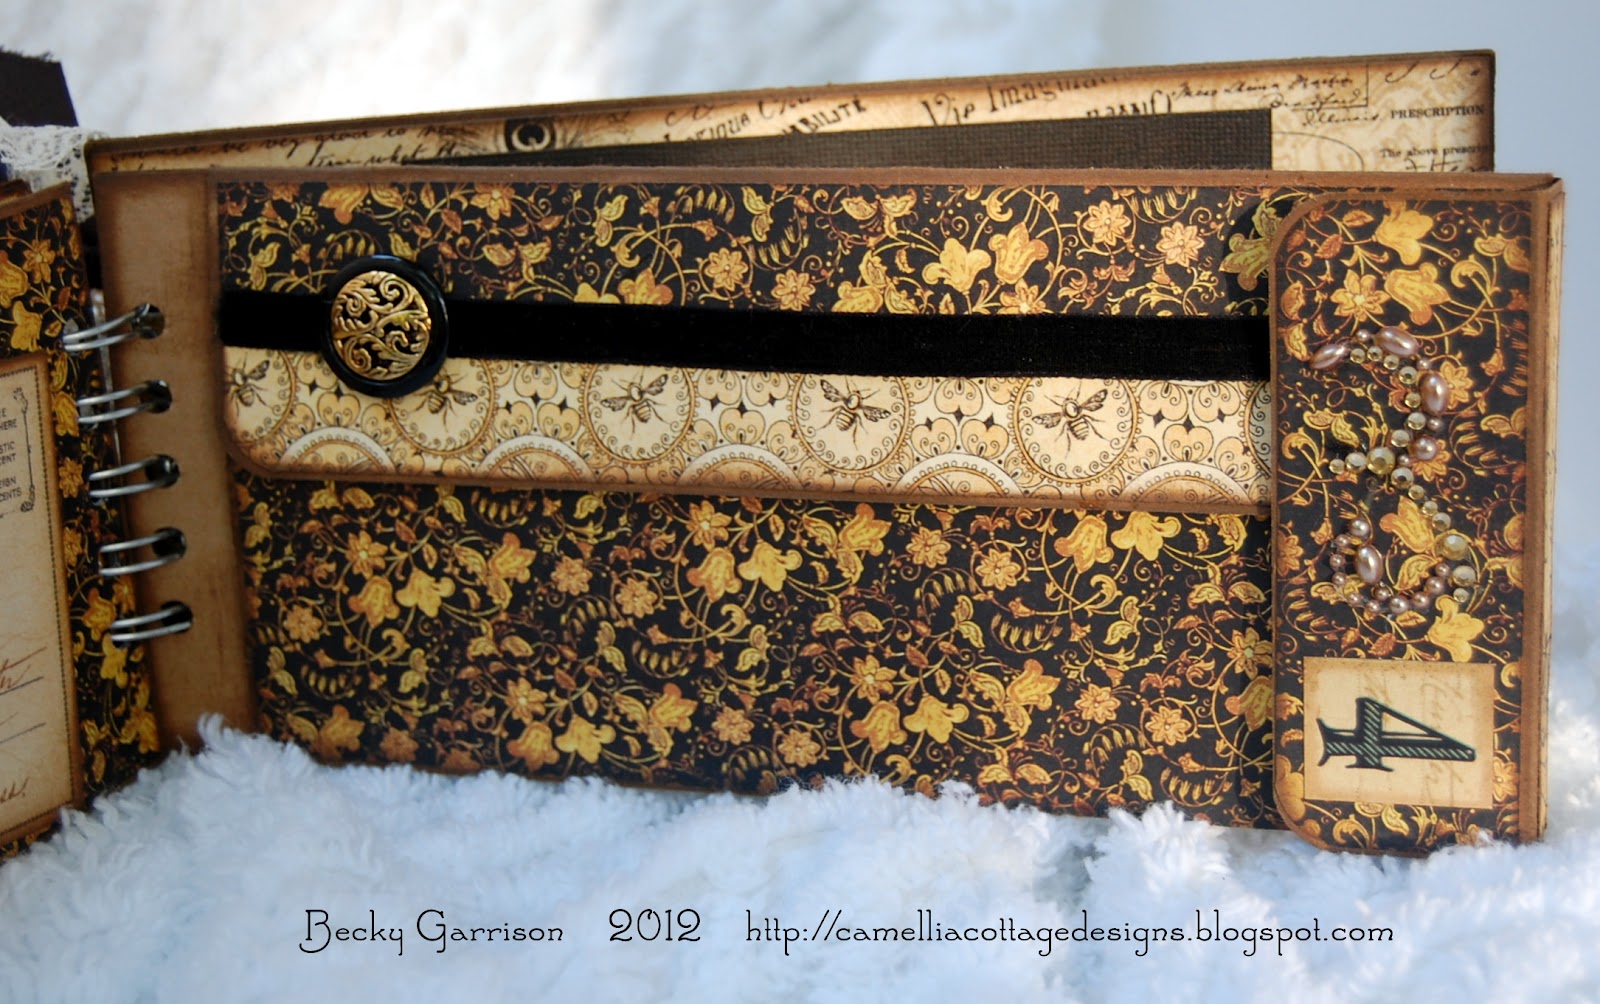
Page Seven Close-Up.  This page opens at the flap, but it is an envelope for storing ephemera and treasures.


Pages Eight and Nine


Page Eight Close Up - There is a tag tucked behind the post card pocket.


Tag that fits in behind the pocket made from the post card.


Page Nine Close Up - Closed


Page Nine Opened


Page Ten - Tag in pocket has space for journaling on reverse


View of Page Ten with Tag out of pocket


Inside Back Cover with mat for larger photo


Back Cover


Whew!  That's a bunch of pictures!  Here's all the info ...

Supplies:
  • Base Card Stock (Kraft) - The Paper Studio
  • Patterned Papers, coordinating stickers and chipboard - Graphic 45 'Olde Curiosity Shop'
  • Bling - Prima and Want 2 Scrap
  • Epiphany Crafts Round 25 Bubble Caps
  • Binding Wires - We R Memory Keepers
  • Hook and Loop Tape - Velcro
  • Stamps - Anna Griffin
  • Stickles 'Platinum' and 'Copper'
  • Yellow Ribbon Flower - Maya Road
  • Ribbon, lace, burlap and rick-rack - my stash
  • Vintage Button - my stash
  • Seam Binding - Bluebird Lane Etsy Shoppe
  • Corrugated cardboard - shipping box
  • Brown ink - Stampabilities

Tools:
  • The Cinch - We R Memory Keepers
  • Cricut Expression and Plantin Schoolbook cartridge
  • Martha Stewart / EK Success paper trimmer
  • Martha Stewart / EK Success scoring board
  • Scissors, ruler, craft knife, 1/4" hole punch
  • EK Success Medium Corner Rounding Punch
  • Fiskars 'Apron Lace' Border Punch
  • Epiphany Crafts Round 25 Shape Studio Tool

As I said before, this wasn't the easiest album I've ever made, but it sure did come out nice, and I love the pages that open up for your layout.  Thanks for visiting today, and I hope to see you back here soon!!!  Becky

4/22/2012

What's Up???

Hello!  I know I've been away for a while, but the last few days have been pretty rough!  On Wednesday afternoon (4/18) my 81 y/o Mama was trying to climb into a chair to get a bowl from the top of her cabinet, and slipped and fell, hitting her head on the refrigerator, and fractured her neck ... between the 1 & 2 vertebrae.  I have stayed in the hospital with her constantly except for a couple of quick trips home (hers and mine) to get things we needed.  She has a lot of pain, and is a neck collar and will be for at least 10 - 12 weeks. 


Right now the pain is spiking from time to time ... the result of muscle spasms and the pain of the fracture.  She is a trooper, and trying so hard to do well!

She is still in the hospital, where we have been since Wed. night.  I have been with her almost 24/7, except for a couple of trips to her home and mine to pick up things we needed.  The cot they've given me isn't terribly uncomfortable!  The hope is that by tomorrow she will be moved to a rehab facility near my home, where she will be 2-3 weeks to build up her strength and learn to deal with the collar.  Then she will probably be at my house for a while and hopefully then go home to her home. 

My life won't be the same for a while, but as soon as we get her in rehab I should be able to resume most of my routine, but with daily visits with her.  I can't really bring my scrapping supplies into the hospital, although I've really tried to figure out a way!   So please be patient with me, and in a few days I should be able to get back to creating and sharing my projects with you!


And if you are a praying person, we would appreciate any prayers you lift up for Mama!  Thank you, and Blessings, Becky


4/16/2012

Graphic 45 'An ABC Primer' "My Grands" Mini Album

Hello!  I'm back!  I know I've been gone for a couple of weeks, but with good reason!  First, just life things, things like taking my Mama for a doctor's appointment, and packing for our camping trip to Savannah, GA.  Then, of course, vacation in Savannah!  And most of the things I've been making creatively have been for design team assignments or submitted for publication, and I haven't been able to share them with you ... until now! 

Here is one of my latest mini album projects, using one of my favorite paper collections ... Graphic 45's 'An ABC Primer'.  I had actually submitted it for publication, but it wasn't accepted, so now I can share it with you!  This mini album is available for purchase, so if you are interested, please contact me at lifeatcamelliacottage (at) gmail (dot) com.

First the pictures, then the info ...


Front cover ... corrugated cardboard, painted lightly with white acrylic paint.


I am the queen of fat mini's!  See how chunky this one is???

Inside front cover and page one.

The image of the little boy in the chair flips up to expose two (2) photo mats.

Close up to show the hidden photo mats.

The tag slides in under the picture of the little boy ... great spot for journaling.  Photo mat on t he right side.

The black mat on right looks like a blackboard.  The right side is an envelope for storing ephemera.

Close up of the envelope.  These are so easy to make!

More hidden photo mats under the left side, and a small journaling tag on the right.

Photo mat on the left using corrugated cardboard.  The pocket on the right side holds a tag that is perfect for journaling.

Close up of the pocket and tag.  These pockets are so much fun to make!

Photo mat on the left side, another hidden tag under the image of the little girl.

Back cover ... corrugated cardboard painted with white acrylic paint.

Supplies:
  • Corrugated cardboard - a cardboard box, broken down and stripped
  • Cardstock (kraft) - The Paper Studio
  • Patterned paper - Graphic 45 'An ABC Primer'
  • Ink - Stampabilities
  • Paint - Plaid
  • Stickles 'Platinum' - Ranger Ink
  • Flowers - Prima
  • Burlap ribbon - Maya Road
  • Other ribbons and lace - my stash
  • Vintage buttons - my stash
  • Brown ball fringe - Bazzill Basics
  • Journaling stamp - Anna Griffin
  • Woven jute ribbon - Anna Griffin
  • Wide Jute trim - May Arts
  • Hook and loop tape - WalMart
  • Binding wires - We R Memory Keepers 'The Cinch'

Tools used:
  • Paper trimmer -  Martha Stewart/EK Success
  • Scoring board -  Martha Stewart/EK Success
  • The Cinch - We R Memory Keepers
  • Cricut Expression and Plantin Schoolbook Cartridge (tag)
  • Ruler, scissors, craft knife
  • EK Success Border Punch - Arch Scallop
  • Recollections 1 1/2" Scalloped Circle Punch

I really love my Cinch ... it's so easy to make albums of all sizes and shapes. 

I hope you've enjoyed this mini album!   As I said above, it's available for sale, and if you are interested, send me an email at lifeatcamelliacottage (at) gmail (dot) com.  Come back soon!  I've got a couple more mini's and some cards to share, plus a big announcement coming up soon!  Blessings, Becky