Thanks for visiting!


Welcome! This is the place where I share my artsy and crafty projects. I am an evolving artist these days ... finding myself enjoying less of the cards and mini albums that I have made for years, and turning to art journaling and more artistic endeavors. I have always enjoyed some craft or other, and some of my earliest memories of my mother helping me make paper dolls and other crafts. I am now in my 60's and finding myself more passionately enjoying creating beautiful things and learning new skills and techniques and products.

While you are here I hope you will find inspiration and ideas for making your own projects, however any images or projects you find here are my personal property and should not be used for your own monetary gain, or for contests or challenges. Thank You!

1/28/2013

The Kraft Journal Make It Monday 'Nothing But Kraft' Challenge ... and a big announcement!

Hello there!  Welcome to my post for this week's 'Make It Monday' challenge at The Kraft Journal.   This week's theme is 'Nothing But Kraft', and as usual you are encouraged to interpret the theme in any way you think fits.  My first thought when I saw this theme was 'Oh no ... how do you make a pretty project using nothing but kraft?', but with all of the kraft goodies available at Kraft Outlet, it was really fairly easy.  Here is my project for this week's challenge ...


When I started working on this project, I decided if I couldn't add lots of color, then I needed to add lots of texture, and that is what I did using corrugated kraft paper, a small tag, burlap ribbon and hemp cord.  Here are all of the details ...

Supplies:


Tools:
  • Martha Stewart / EK Success Paper Trimmer
  • Martha Stewart / EK Success Mini Scoring Board
  • Scissors, Ruler, Craft Knife

What do you think?  At first it may look like a kind of masculine card, but it really would be great for anyone.

I am very excited to announce something big going on at Kraft Outlet!  Effective immediately, Kraft Outlet has launched a new endorsement program!  What this means is that if a project that you created using at least 50% Kraft Outlet products is published in an approved magazine, you could receive a cash payment as a thank you for using Kraft Outlet products!  For a list of guidelines and approved publications, check out THIS POST on The Kraft Journal ... the Creative Team blog for Kraft Outlet. 

Thanks for visiting today!  Don't forget to check out this week's challenge, as well as more information on the new endorsement program by visiting The Kraft Journal blog.  Blessings,


1/23/2013

Loving My New 'Thing'!

Hello!  Are you as cold as I am?  It seems the whole USA is frigid and frozen and even iced over in some places!  And here in the beautiful Southeastern US it is no different!  Lows in the 20's, wind chills in the single digits to teens ... it's just plain cold!  BUT!  That means I can stay inside and play, and play I have been doing!

I have been experimenting and exploring with mixed media art, and I am really enjoying it!  It kind of lets you just go with the flow and see how things work out!  A week or two ago I was on Pinterest and started a board called "Art Journaling Inspiration Pins" and pinned this to the board  ...


And I knew that I had to do this one as soon as possible!  So I took some vintage dictionary pages, cut them into squares about 2 to 3 inches square, and started out with the Mod Podge.  And here is what I came up with ...


After the dictionary squares and Mod Podge had dried, I dry brushed on some white acrylic paint, to give a softer look to the page.  Then I cut out a heart and traced around it with a Micron marker, and painted the inside of the heart with more white acrylic paint.

Now, I do things a little differently from most people I've talked to when it comes to paint.  I like to buy very inexpensive acrylic sets in tubes ... seriously, the ones I have now have no brand name on the box or the tubes, but I got 3 sets for a very low price on ebay a couple of years ago ... and then, using inexpensive (Plaid, Apple Barrel, etc.) white acrylic paint, I mix my own colors.  And no, I'm not very good at mixing colors, but it works for me!  So for the roses I started with the darkest blue that you see on the bottom of the heart, and then mixed more and more white until I got the four different shades of the same color.  


The words are all about love, and were written with a Micron marker.  When all the paint was dried, I coated the heart with a coat of my new favorite art supply ... Art Anthology's 'Splashed' Sorbet.  It is a clear base with lots of sparkly glitter and mica.  If you haven't discovered Art Anthology yet, you really should check them out!  They are a brand new company with lots of cool products for mixed media art.

So tell me, what do you think of my take on Maya Road's photo?  I love how it came out and am already working on another project.  Thanks for visiting, and many blessings ...


1/21/2013

The Kraft Journal # 105 ... "Punch It Out"

Hi there!  Welcome to Make It Monday for The Kraft Journal.  This week's theme is "Punch It Out", and as we are always encouraged to come to our own conclusions as to what the theme means, I decided that for me it meant using a punch tool!  Here is my project for this week ...


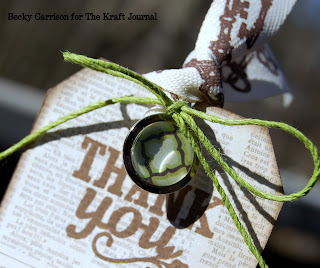
A pretty tag is a great way to say thank you or hello or just about any sentiment you wish to share!  Here are the details ...

Supplies:


Tools:

  • Scissors, kraft knife, ruler
  • EK Success 1 1/2" Scalloped Circle Punch
  • Epiphany Round 14 Punch Tool 


To Make The Flower:
  1. Punch three (3) scalloped circles from coordinating patterned paper.
  2. Spray both sides of all three circles with a mist of water.  Allow to sit for a minute or two. 
  3. Scrunch, fold, roll up the three circles.  Allow to sit for another minute or two.
  4. Straighten out the three circles and allow to dry.  You can allow them to dry on their own, dry them with a heat tool, or in the microwave, checking every 20 to 30 seconds.
  5. Ink edges of circles.
  6. Stack, adding adhesive between the three layers.
  7. Add a charm, bead, button, etc. to the center.  I used an Epiphany Round 14 bubble cap with coordinating paper on mine.
  8. Adhere to your project.
Thanks so much for visiting today ... I hope you will try making some tags as they are so very easy and appreciated!  Blessings,


1/16/2013

The Kraft Journal 'Watch Us Wednesday' Tutorial

Hello, and Happy Wednesday!  I am here with a post for The Kraft Journal, and a very cute project that I made using scraps of paper and ribbons and such.  This week's theme was 'Use Your Scraps', and it was my week to do the tutorial, so I came up with this sweet 'love' themed mini album ...


The album measures 3 3/4" x 4 3/4" not counting the rings that bind it and the ribbons.  Here are pictures of each of the pages ...


And here are the details ...

Supplies:

  • Interior Pages - Library Pockets
  • Tags - Grungy Prim Tags
  • Covers - Scrap Chipboard
  • Patterned Papers and Chipboard Stickers - Crate Paper 'Paper Hearts'
  • Ink - Stampabilities
  • Ribbons - Stash
  • Card Stock - Bazzill 'Card Shoppe' Card Stock


Tools:

  • Martha Stewart / EK Success Paper Trimmer
  • Scissors, craft knife, ruler
  • EK Success 'Small' Corner Rounding Punch

Thanks for visiting today!  For step by step instructions for making your own 'library pocket' mini album, please visit my 'Watch Us Wednesday' post at The Kraft Journal.  Blessings,

1/07/2013

The Kraft Journal 'Crimp or Fold' Challenge

Hello, and Happy Monday!  I am back again with another project for the 'Make it Monday' challenge at The Kraft Journal.   This week's theme is 'Crimp or Fold', and for my project I chose to make a sweet pennant banner.  This pennant is cheery and bright and could be used for a baby or child's room, or as a gift for a friend, or just a cheery addition to your home decor.  Here is my project ...


Making the large yellow gingham rosette was not hard, but in order to make one as large as that (approx. 6" across) you need to add extra length.  For this one I simply cut two strips of patterned paper that were 3" x 12" each, and scored each strip every 1/2 inch for the entire length.  Then I glued the ends together to make a 'circle'.  To help it hold it's shape I added a scrap of heavy card stock to the top and bottom, adhered to the center of the circle with Beacon's 3 in 1 Advanced Craft Glue.  Next I added a white paper doily and a chipboard butterfly painted with shimmery blue paint.


Supplies:
  • Burlap Triangle - Kraft Outlet
  • Patterned Paper - The Paper Studio
  • Buttons - Buttons Galore and More
  • Ribbon - Stash (on a Christmas gift from a friend)
  • Doily - Wilton (Hobby Lobby)
  • Chipboard Butterfly - Scenic Route (very old)
  • Wire for Antennae - WalMart
  • Paints - Art Anthology 'Baby Blue Eyes' and 'Chocolate'
  • Mists - Art Anthology 'Plush' Colorations


Tools:

  • Martha Stewart / EK Success Paper Trimmer
  • Martha Stewart / EK Success Scoring Board
  • Scissors
  • Needle and thread

I hope you have enjoyed my project for The Kraft Journal today!  Be sure to visit them by following the link above to see the rest of the Creative Team's projects and be inspired!  Blessings,