Thanks for visiting!


Welcome! This is the place where I share my artsy and crafty projects. I am an evolving artist these days ... finding myself enjoying less of the cards and mini albums that I have made for years, and turning to art journaling and more artistic endeavors. I have always enjoyed some craft or other, and some of my earliest memories of my mother helping me make paper dolls and other crafts. I am now in my 60's and finding myself more passionately enjoying creating beautiful things and learning new skills and techniques and products.

While you are here I hope you will find inspiration and ideas for making your own projects, however any images or projects you find here are my personal property and should not be used for your own monetary gain, or for contests or challenges. Thank You!

6/19/2012

Epiphany Crafts Color Challenge


I finally got to see an Epiphany tool - and all you can do with them - in action earlier this year, but I am now totally sold on them!  You can use the tools with the matching bubble caps and 'findings', or you can use them just as a punch!  Seriously, if you haven't checked them out, you really should, because the possibilities for using them are endless!  I am now proud owner of the round 25 and heart 25 shape tools, and the flower 20 button tool.


This week Epiphany Crafts is having a color challenge, asking you to use a 'rainbow' of colors on a project.  As soon as I saw the challenge, I knew what I wanted to do with it.  Can you say Simple Stores 'Summer Fresh' chevron paper???  What's better than a rainbow?  Well, a chevron rainbow, of course!!!

Here is my card based on the challenge ...


And here are all the details ...

Supplies:
  • Kraft card stock (base) - The Paper Studio
  • Patterned papers and sun element - Simple Stories 'Summer Fresh' collection
  • Flower buttons - Epiphany 'Flower 20' button bubble caps
  • Sentiment - SRM Stickers
  • Brown ink - Stampabilities
  • Stickles 'Diamond' and 'Platinum' - Ranger Ink
  • Brown corded twine - Maya Road
  • Red twine and bumble bee - my stash


Close up of flower pot using Epiphany Crafts 'Flower 20' Button Studio Tool and button bubble caps


Tools:
  • Epiphany Crafts 'Flower 20' Button Studio Tool
  • Martha Stewart / EK Success Paper Trimmer
  • Martha Stewart / EK Success Scoring Board
  • Scissors, Ruler, Craft Knife

Steps:
  1. Cut kraft card stock to 5" x 10".
  2. Score center line to make card 5" square.
  3. Ink edges with brown ink.
  4. Trim 'chevron' paper to 5" square and adhere to kraft card stock.
  5. Fussy cut sunshine element with scissors and adhere to card.
  6. Cut flower pot shape from burlap paper using scissors and adhere to card.
  7. Adhere sticker sentiment to scrap of kraft card stock.
  8. Trim card stock to slightly larger than sticker.
  9. Ink edges with brown ink.
  10. Adhere sentiment to card using foam dots.
  11. Cut basic leaf shapes from green polka dot paper and ink edges with brown ink.
  12. Adhere leaves to card, just above the flower pot.
  13. Make the flowers by using the Epiphany 'Flower 20' punch and buttons.  I used scraps of 5 different pages from the Simple Stories 'Summer Fresh' papers.
  14. Thread flower buttons using red bakers twine.
  15. Make a small bow from twine and adhere to flower pot.
  16. Adhere bumble bee to card.
  17. Using a black sharpie, make a dashed 'flight pattern' behind the bumble bee.
  18. Add 'Diamond' Stickles to the flight pattern.
  19. Add 'Platinum' Stickles to the rays of the sun.

And there you have a very cute card that could be for a birthday, congratulations, or encouragement card.  Please check out the Epiphany Crafts blog (link above) to find out more about this week's challenge!  Blessings, Becky


6/07/2012

Simple Stories 'Summer Fresh' and Maya Road Wall Hanging


I spent most of today at one of my favorite places ... my 'LSS' or Local Scrapbooking Store, Altered Angel near Alpharetta, GA.  There were just a few of us there playing and chatting and laughing and just having a good time.  The owner of the store, Mary, came in for a while and brought with her a box of new goodies from Maya Road, and as she pulled them out of the box and priced them, I grabbed a little cellophane bag that caught my eye.  It was the "Mini Rectangular Chipboard Accordion" ... a set of six 2 1/2" by 4 1/2" (approximately) chipboard rectangles connected by fairly heavy duty jump rings.  I immediately saw a wall hanging, told Mary there was no need to hang that one on the rack as it was MINE, and got busy!

I decided to use some of the 'leftovers' from the Simple Stories 'Summer Fresh' collection that I used for the mini album I made a few weeks ago.    And this is what I had a couple of hours later  ...


And here are the first two sections of the wall hanging ...


And the next two sections ...


And the final two sections ...


I love it, and I think it's going on the wall in my kitchen ... I have it decorated in a 'farmhouse' style with lots of red, blue and a mustard-y yellow ... so I think it will look cute on the wall in there.  Here are all the details ...


Supplies:
  • Chipboard base - Maya Road 'Mini Rectangular Chipboard Accordion'
  • Patterned paper, and coordinating sticker - Simple Stories 'Summer Fresh' collection
  • Other stickers - SRM Stickers
  • 'Bubble Caps' - Epiphany Crafts
  • Red Twine - May Arts (I braided three strands to get a heavier hanger)
  • Pleated Denim Trim - Maya Road
  • Brown ink - Stampabilities

Tools:
  • EK Success Corner Rounding Punch - Small
  • Epiphany Crafts Shape Studio Tools - Round 25 and Circle 25
  • Martha Stewart / EK Success Paper Trimmer
  • Scissors, Ruler, Craft Knife

I thoroughly enjoyed this project, and it went by in a flash!  I've already made up my mind that I want to buy another one when I go back on Saturday, but make it as a mini album ... I think it would be really, really cute used for an album, too!  Thanks so much for visiting today!  Blessings, Becky


6/05/2012

Authentique Paper - Fresh - June Sketch Challenge


Hi there!  Welcome to Camellia Cottage!  I hope you are ready for something a little different from me today, because that's what you're going to get!  I have made a few 12" x 12" layouts, but my area of expertise is cards and mini albums, but I just bought the new 'Fresh' collection from Authentique Paper, and then I saw their June Sketch Challenge, and I have lots of beach pictures, so I decided to give a layout a whirl!  And I'm quite pleased with how it came out!  First, take a look at the sketch ...


I stayed fairly true to the sketch, so here is my layout ...


The two pictures that I used were taken at the same place - Gulf Islands National Seashore - but about 4 1/2 months apart.  The lower picture - the 'sunny day' one was taken May 4, 2011 when my husband and I stumbled upon this amazingly beautiful place.  The upper picture was taken as the same place on Sepbember 22, 2011 when we took my Mama to see it for  herself.  But the rain was torrential and the wind was strong and the clouds were dark, low and heavy.  As we got into the car to leave, Mama saw the rainbow, so I jumped out of the car to get pictures.  One place, two days, two totally different types of weather.

Supplies:
  • Patterned Paper and Stickers - Authentique Paper 'Fresh' Collection
  • Card stock - Bazzill Basics
  • Stickles 'Star Dust' - Ranger Ink
  • Ink - Tim Holtz Distress Ink Pad 'Brushed Corduroy'
  • Bubble Caps - Epiphany Crafts Shape Studio 'Round 25'
  • Vintage lace and ric-rack - my stash
  • Tan with red and white trim - May Arts
  • Twine - October Afternoon 'Sasparilla' Collection

Epiphany Accents - The Fleur de Lis paper came from the back side of the labeling for the 'Fresh' Collection.


Two Days, One Beach!

 
A Sunkissed Day!

Tools:
  • Martha Stewart/EK Success Paper Trimmer
  • Carl PRT-100 Rotary Paper Trimmer (decorative edges)
  • Cricut Expression with Plantin Schoolbook and Songbird cartridges
  • Epiphany Crafts Shape Studio Round 25 Tool
  • Scissors, craft knife and ruler


Here is the layout with the journaling tags showing ... they are tucked in under the photos and can be pulled out using the twine pulls.


I hope you like my first layout in a long time!  Considering I'm so out of practice, I am proud of how it turned out!  Please take a minute and leave a comment to let me know what you think!  Blessings friends!  Becky


5/28/2012

The Kraft Journal - Make It Monday Challenge

Well, it's been a while!  I haven't gotten to participate in many challenges lately.  Things are getting better.  Mama is more than 1/2 way through her time in the collar, and is doing very well.  The pain is almost non-existent other than  just the discomfort of the collar.  Breaking your neck at almost 82 years old isn't easy, but she's really handled it so well!

Anyway, as I said above, I haven't been able to participate in any challenges lately, and wanted to spend some time today doing just that.  The Kraft Journal ... blog for The Kraft Outlet ... has a cool challenge, asking us to 'Emboss and Embellish', and that's just what I did!  Here is my card .....


 Supplies:
  • Kraft card stock - The Paper Studio
  • Patterned paper - Paper Hearts - Crate Paper
  • Image - Found on Pinterest
  • Sheet Music Tissue - Tim Holtz
  • Brown Ink - Stampabilities
  • Paints - Jenni Bowlin Paint Dabbers 'Stick Candy', 'Chewing Gum', 'Speckled Egg'
  • Vintage Grosgrain Ribbon - Estate Sale Find
  • Stickles 'Diamond' - Ranger Ink
  • Beacon 3 in 1 Advanced Craft Glue
  • Glue Arts 'Gluedles'


Tools:
  • Martha Stewart / EK Success Paper Trimmer
  • Martha Stewart / EK Success Scoring Board
  • Cuttlebug and 'Textiles' and 'Birds and Swirls' Embossing Folders
  • Ink Jet Printer and computer
  • Scissors, ruler and craft knife

The ribbon flower was made by tying a large knot on one end of the ribbon and wrapping it around, gluing it down to a scrap of chipboard.  The leaves were painted kraft cardstock, then embossed and cut after the paint was dry.

Thanks for visiting today!  I hope to be taking part in more challenges now that things are calming down.  Have a great week!  Blessings, Becky


5/21/2012

Simple Stories - Summer Fresh Collection - Mini Album

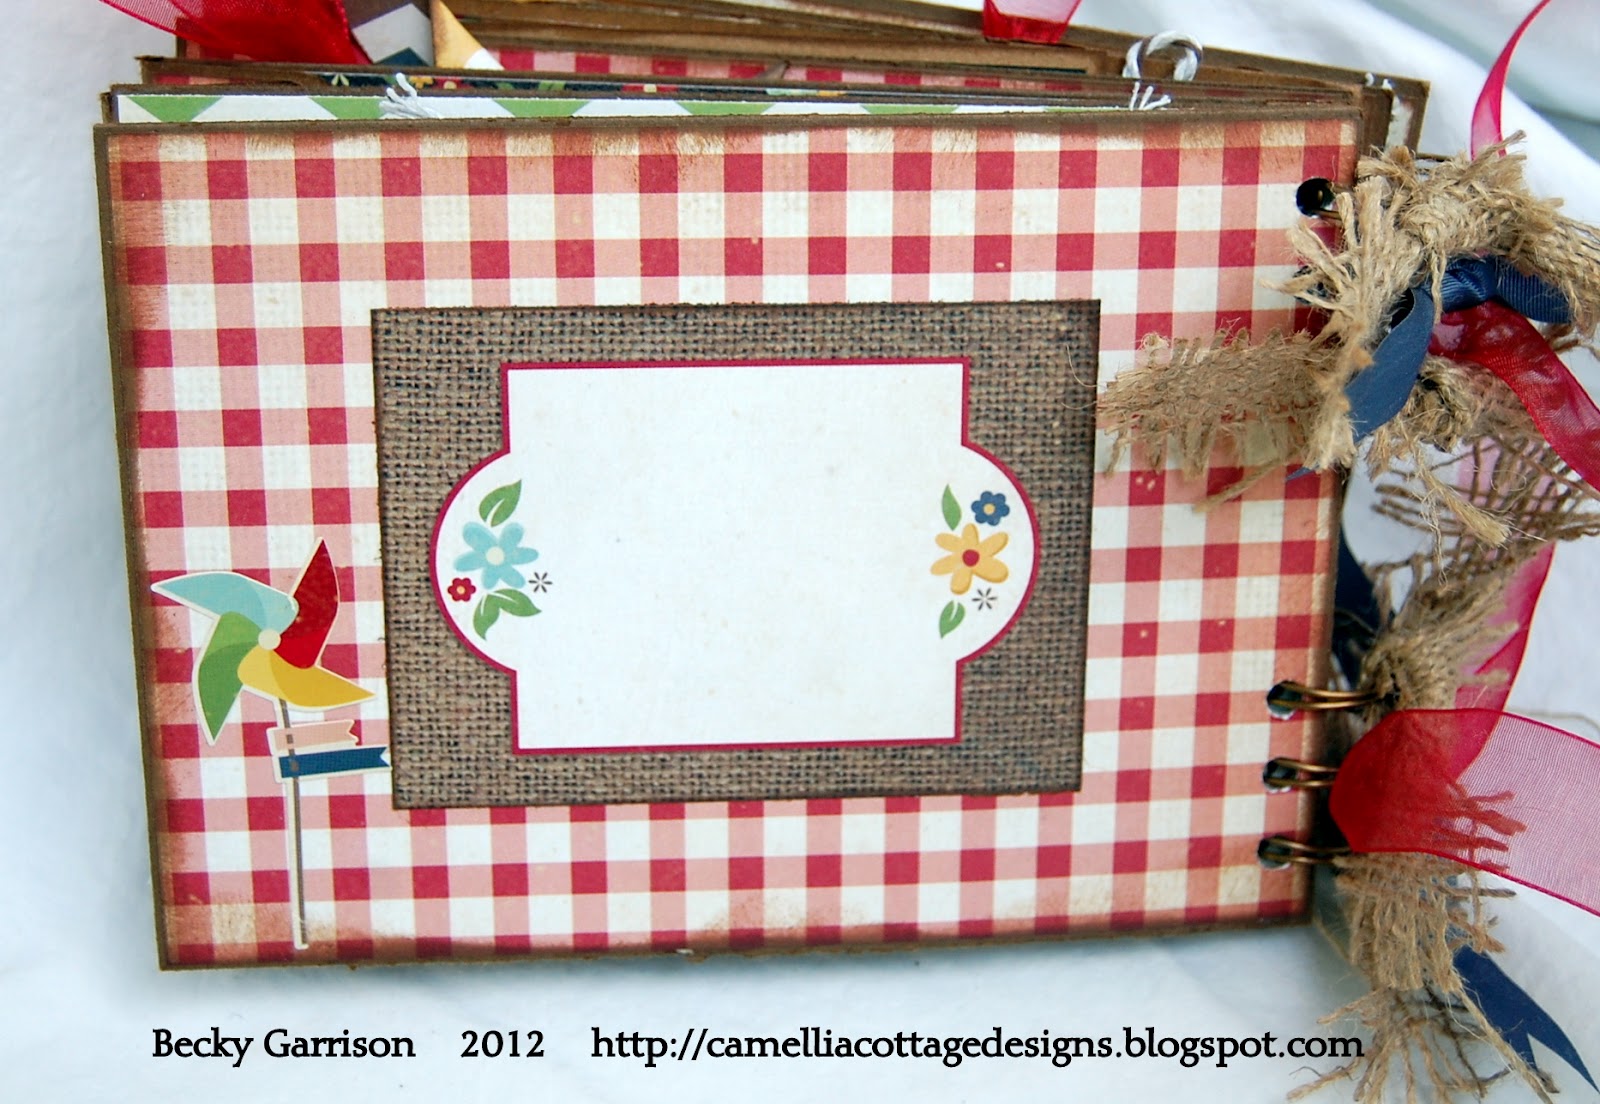
Hi Folks!  I'm back today with a new mini album that I made with the sweetest, coolest collection I've seen in a while!  It's 'Summer Fresh' collection from Simple Stories.  The first moment I saw this collection at my LSS (Altered Angel, Alpharetta, GA), I knew that if I could design a collection that was ME, this one would be pretty darn close to it!  I love the country, summer, mason jars, pinwheels, overalls, pennant banners, burlap and calico and everything else in this collection!  This is another photo heavy post, so hold on to your hats,  here we go ........ !

Front Cover


Side View From Top

Pages One and Two ... I like having a 'title page' in my mini's, so I fussy cut the  shipping label and tapes from one sheet of paper and adhered it to the page, then added a bit of washi tape to the left side.  Page Two has a 'cupcake' pocket with a tag with journaling space stamped on the back, a 'flip mat of kraft card stock with space for 3 small photos, and a dimensional flower made from punched circles of paper.  I used more of the red and white polka dotted washi tape for pops of color here, too.

Pages One and Two

 
Page One


Page Two

 
Page Two with tag removed from pocket

Pages Three and Four have room for three photos and I backed the 'Summer' bingo card with kraft card stock so you can do your journaling on the back of it.  Page Four has a base of corrugated cardboard (♥♥♥♥) and a couple of stickers from the kit for embellishments as well as an Epiphany 'Heart 25' Bubble Cap backed with a bit of paper from the kit at the bottom right hand corner.

Pages Three and Four


Page Three


Page Three with Bingo Card Removed


Page Four
Pages Five and Six have room for larger photos!  There are two double mats for 4 x 4" photos in the pocket on Page Five and they are backed with kraft card stock so you can journal on the back of them.  Page Six has one 4 x 4 double mat with a small tag for journaling.


Pages Five and Six


Page Five with removable photo mats


Page Six

Pages Seven and Eight are so cute!  For page seven I made a pinwheel and made a green 'stem' from some old Bo bunny chalkboard chipboard (yes, it was black) and added a photo mat and a couple of stickers.  Page Eight has a few vintage button from my stash, a denim pocket with Fancy Pants ball fringe at the bottom, some Prima flowers, and Maya Road denim pleated trim.  There's a tag inside that can be used for a small photo or journaling.

Pages Seven and Eight


Page Seven


Page Eight

Pages Nine and Ten are my favorites in this album!  Page Nine is an envelope where you can store treasures like tickets, small photos and such.  The pale blue mat has a pocket full of flowers on front, and opens to show spaces for two photos.  The flap is held in place with some hook and loop tape and is topped with a soda bottle sticker, and the 'ribbon' sticker says 'seriously best day ever'.  Page Ten looks like an envelope, but it opens all the way up to show a layout with a gingham cloud with raindrops, a journaling tag, a clothesline with overalls, a flip mat for three photos, another journaling tag, a mason jar and a pocket that holds 3 tickets on which you can write down your memories.  The page closes up and is held closed with more hook and loop tape.


Pages Nine and Ten


Page Nine showing envelope flap opened


Page Ten Closed


Page Ten Opened

Pages Eleven and Twelve ... don't you love that chevron paper!  Page Eleven has places for two photos, Maya Road pleated denim trim, braided jute twine from Anna Griffin, and stars cut using the Epiphany Star Shape Studio Tool.  Page Twelve has a place to write down all 'The Details', and a pennant banner made using the Epiphany Pennant Shape Studio Tool, a bright shiny sun, and letters stating this was 'the best summer ever'! 


Pages Eleven and Twelve


Page Eleven


Page Twelve


And the back cover simply has a place to write a note or your name, or the name of the person you might give it to as a gift!


Back Cover

This album is bound using We R Memory Keeper's 'The Cinch', and I used strips of burlap, red and blue ribbon to decorate the wire binding.

Supplies:
  • Patterned paper and stickers - Simple Stories 'Summer Fresh' Collection
  • Kraft card stock - The Paper Studio
  • Brown Ink - Stampabilities
  • 'Denim' Embossing Powder - Ranger Ink
  • Washi Tape (red with white polka dots) - Queen & Company
  • Stickles 'Star Dust' and 'Platinum' - Ranger Ink
  • Binding Wires - We R Memory Keepers
  • Brown and white corded twine - Maya Road
  • Journaling stamps - Anna Griffin
  • Round, Star, Pennant and Heart 'bubble caps' - Epiphany Crafts
  • Yellow ruffled ribbon flower - Maya Road
  • Brown ball fringe - Fancy Pants Designs
  • Green chipboard - Bo Bunny (embossed with green Ranger embossing powder)
  • Yellow and green paper flowers - Prima
  • Rain Dots - Cloud 9 Design
  • Braided jute twine - Anna Griffin
  • From my stash - burlap, red and blue ribbon, vintage buttons, chipboard numbers and cream lace

Tools:
  • The Cinch - We R Memory Keepers
  • Martha Stewart / EK Success Paper Trimmer
  • Martha Stewart / EK Success Scoring board
  • Fiskars 'Apron Lace' Border Punch
  • Recollections 1.5" Scalloped Circle Punch
  • Cricut Expression and Plantin Schoolbook cartridge (tags)
  • EK Success Corner Rounding Punch - medium
  • Epiphany Crafts Round 25, Heart 25, Star and Pennant Shape Studio Tools
  • Scissors, ruler, craft knife

I have just listed this album for sale on eBay HERE if you are interested!

Thanks for visiting today!  I hope you have enjoyed this sweet summertime mini album!  Come back soon, Becky